Generating a Keystore & PEM Certificate for Android
A keystore is a file that holds your app's signing keys. Android uses two signing modes:
| Mode | Purpose | Keystore |
|---|---|---|
| Debug | Local development & testing — Android auto-generates one | ~/.android/debug.keystore |
| Release | Publishing to Google Play or distributing to users | Your own — must be kept safe forever |
Step 1 — Check if You Already Have a Keystore
Option A: Android Studio (GUI)
- Open your project in Android Studio.
- Go to File → Project Structure (or press
Ctrl+Alt+Shift+Son Windows/Linux,⌘;on macOS). - Select Signing in the left panel.
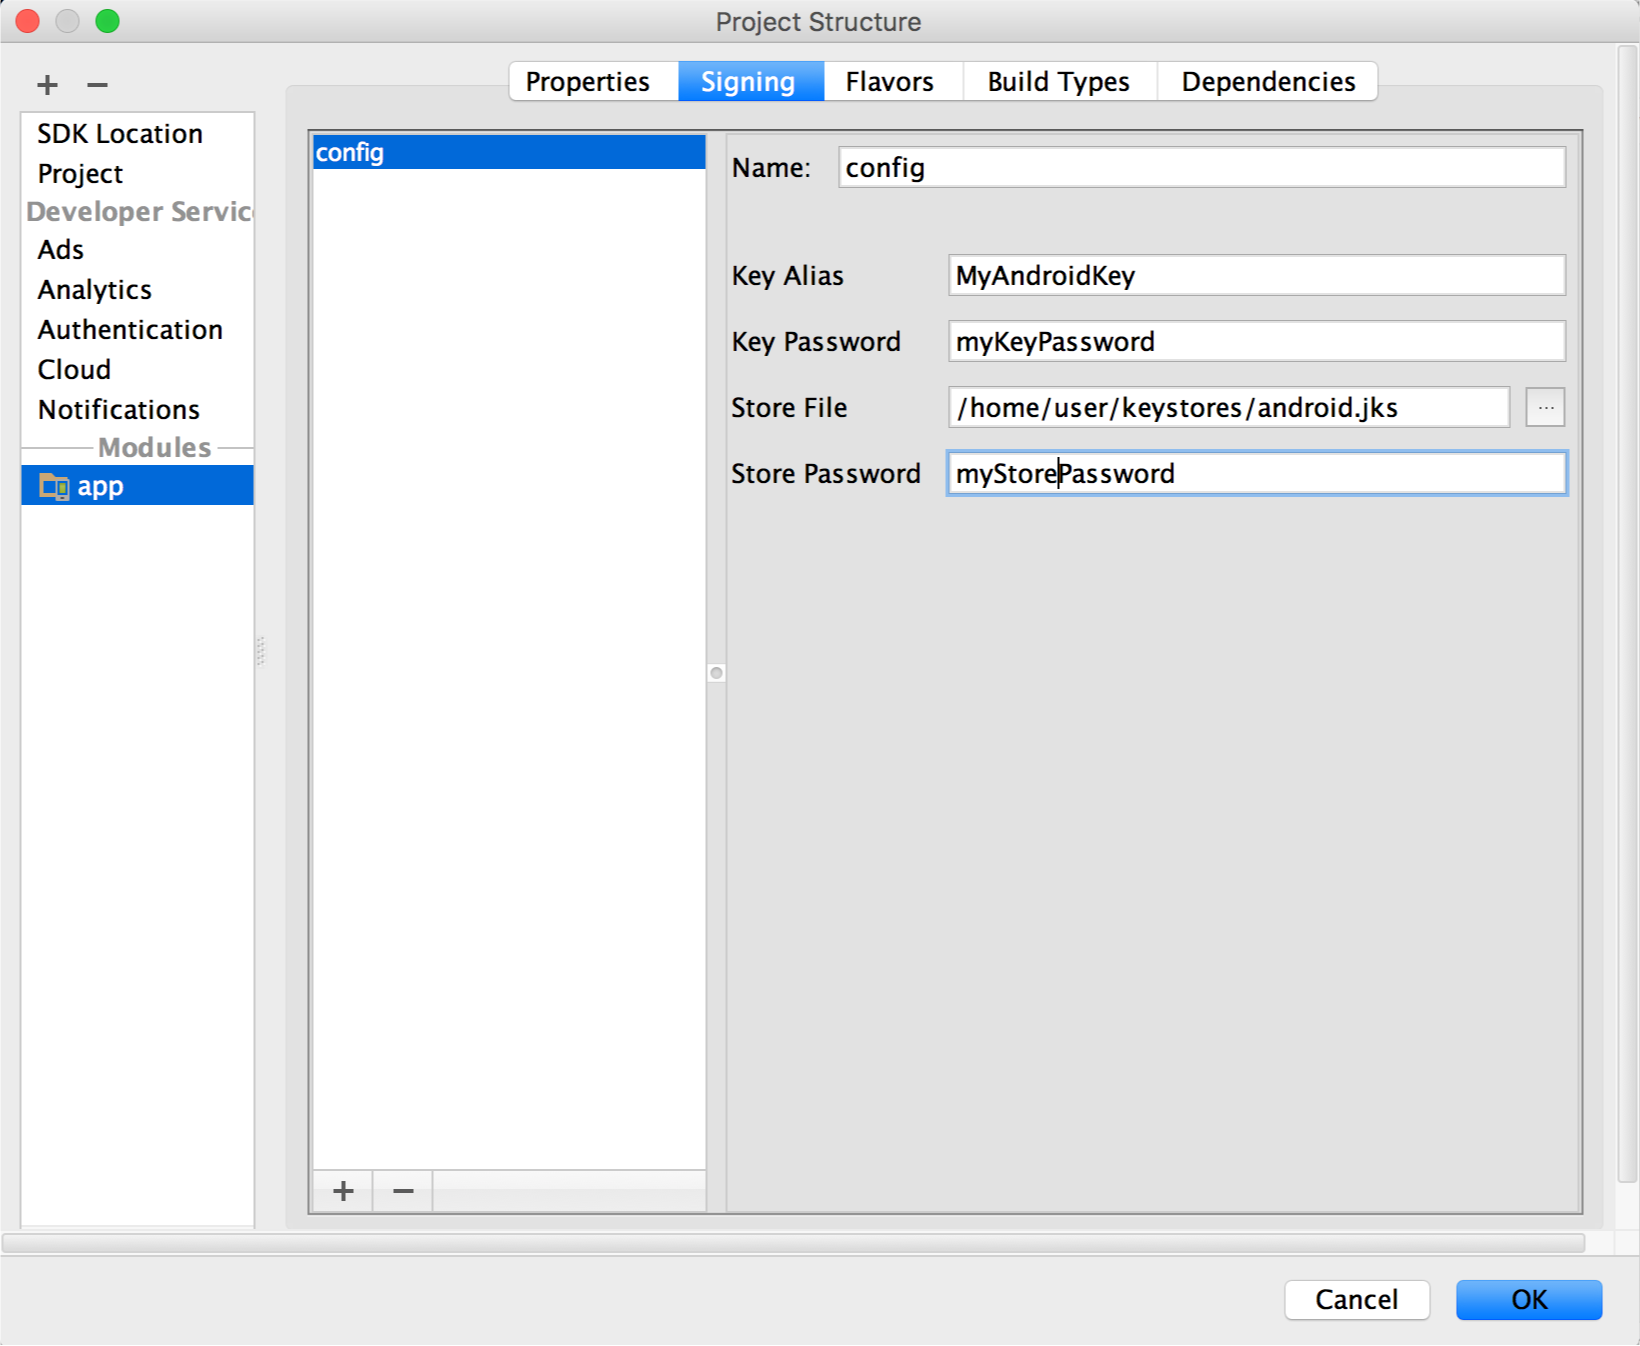
If a signing config exists, the keystore path is shown in the Store file field. Note that path — that is your existing keystore.
If nothing is listed, you do not have a release keystore configured yet. Continue to Step 2.
Option B: Terminal
Check these common locations first:
| Platform | Default debug keystore location |
|---|---|
| macOS / Linux | ~/.android/debug.keystore |
| Windows | C:\Users\<you>\.android\debug.keystore |
| Project (release) | Defined in android/app/build.gradle → signingConfigs.release.storeFile |
Verify any keystore with:
keytool -list -keystore /path/to/your.keystore
- Correct password → lists the key aliases inside. Skip to Step 3.
- Wrong password / file not found → continue to Step 2.
Step 2 — Generate a New Release Keystore
Choose the method that works best for you.
Option A: Android Studio (GUI)
- Open your project in Android Studio.
- From the menu bar go to Build → Generate Signed Bundle / APK.
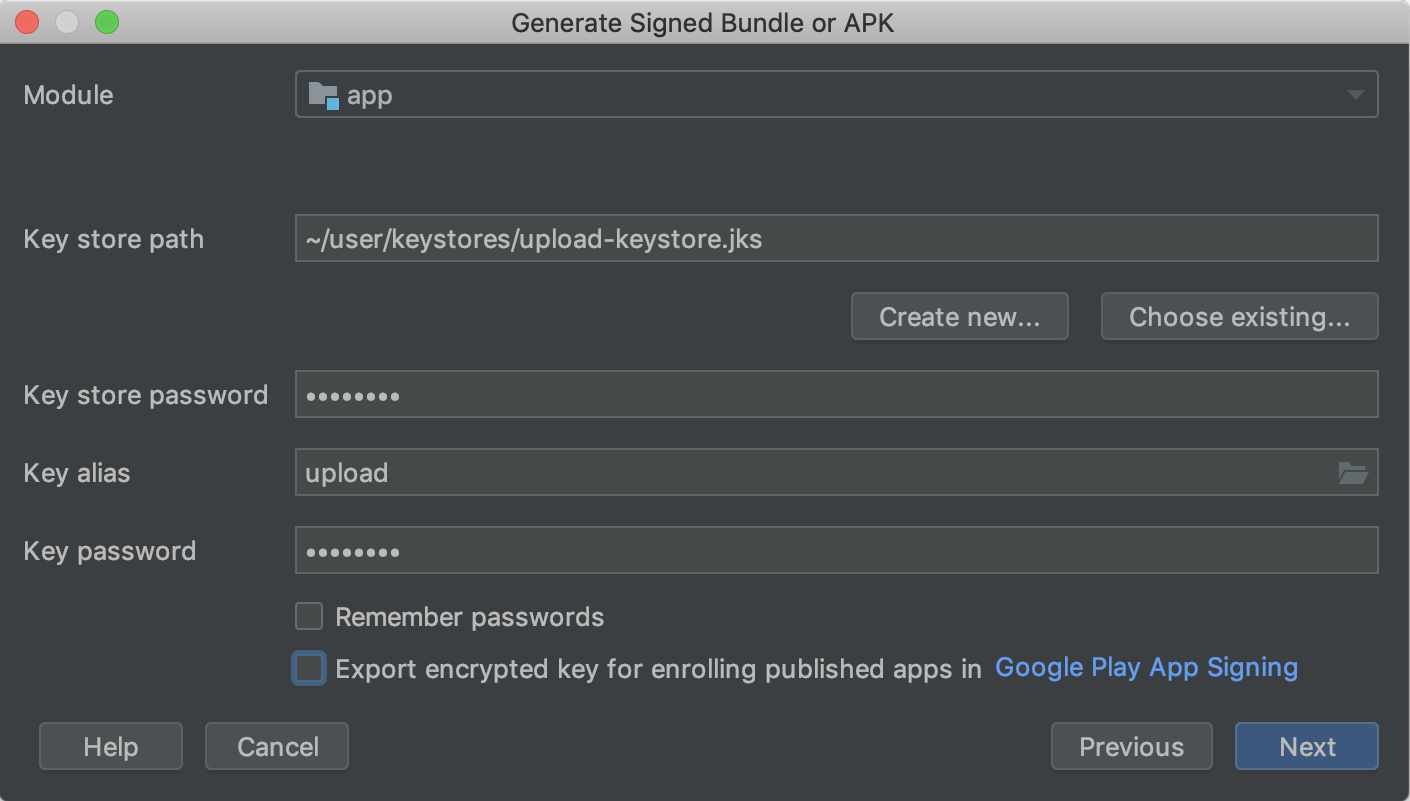
- Select APK (or Android App Bundle) and click Next.
- Click Create new… under the Key store path field.
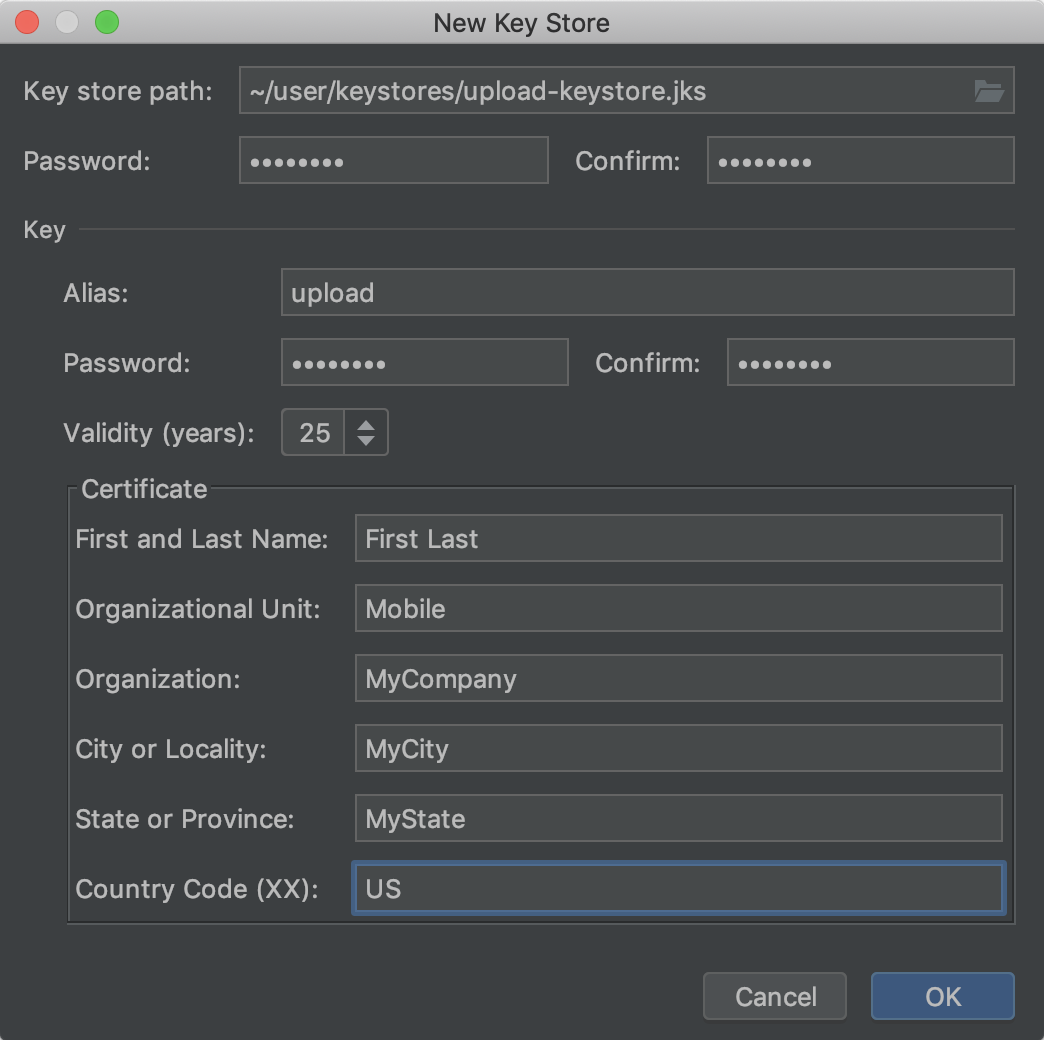
- Fill in the form:
| Field | What to enter |
|---|---|
| Key store path | Where to save the .jks / .keystore file |
| Password | A strong password — save it somewhere safe |
| Alias | A short name for this key, e.g. my-key-alias |
| Key password | Can be the same as the keystore password |
| Validity (years) | 25 is a safe default |
| Certificate fields | At minimum fill in First and Last Name |
- Click OK → Next → choose the release build variant → Finish.
Android Studio signs the APK/AAB and places it in app/release/.
Option B: Terminal (keytool)
keytool ships with every JDK installation.
keytool -genkeypair -v \
    -keystore my-release.keystore \
    -alias my-key-alias \
    -keyalg RSA \
    -keysize 2048 \
    -validity 9125
You will be prompted to enter:
- A keystore password — store this securely (password manager recommended).
- Your name / organisation details (optional, but shown in the certificate).
- A key alias password — can be the same as the keystore password.
The file my-release.keystore is created in your current directory.
Step 3 — Configure Gradle for Signing
Add signing configs to android/app/build.gradle. The debug config is optional — Android fills it in automatically — but you can be explicit:
android {
    signingConfigs {
        getByName("debug") {
            // Android uses ~/.android/debug.keystore automatically.
            // Override here only if you need a custom debug keystore.
            storeFile     = file("${System.getProperty("user.home")}/.android/debug.keystore")
            storePassword = "android"
            keyAlias      = "androiddebugkey"
            keyPassword   = "android"
        }
        create("release") {
            storeFile     = file("my-release.keystore")   // relative to android/app/
            storePassword = "your-keystore-password"
            keyAlias      = "my-key-alias"
            keyPassword   = "your-key-alias-password"
        }
    }
    buildTypes {
        getByName("debug") {
            signingConfig = signingConfigs.getByName("debug")
        }
        getByName("release") {
            signingConfig   = signingConfigs.getByName("release")
            isMinifyEnabled = true
            proguardFiles(getDefaultProguardFile("proguard-android-optimize.txt"), "proguard-rules.pro")
        }
    }
}
Step 4 — Build a Signed APK
Debug build
Terminal:
cd android
./gradlew assembleDebug
Output: app/build/outputs/apk/debug/app-debug.apk
Android Studio: Click Run or use Build → Build Bundle(s) / APK(s) → Build APK(s) and choose the debug variant.
Release build
Terminal:
cd android
./gradlew assembleRelease
Output: app/build/outputs/apk/release/app-release.apk
Android Studio (GUI): Go to Build → Generate Signed Bundle / APK, select your release keystore, choose the release variant, and click Finish.
Step 5 — Export the PEM Certificate
Export the public certificate from your release keystore as a .pem file to send to Nearpay.
keytool -export -rfc \
    -alias my-key-alias \
    -keystore my-release.keystore \
    -file developer_cert.pem
Replace my-key-alias with your actual alias and my-release.keystore with the path to your keystore file.
This outputs developer_cert.pem — a text file containing your public key certificate.
Send the key to Nearpay. You do not need to share the keystore file or any passwords.
Step 6 — [Optional] Get the App Signing Certificate from Play Console
When you publish on Google Play [Optional], Google holds the app signing key and your keystore becomes the upload key only.
- Open Google Play Console and select your app.
- Go to Release → Setup → App signing.
- Under App signing key certificate, click Download certificate — this saves
deployment_cert.der. - Convert it to PEM format:
openssl x509 -inform DER -in deployment_cert.der -out developer_cert.pem
This developer_cert.pem is the certificate you send to Nearpay — it matches the key that signs the app on user devices.
You are all set. Your app is signed and Nearpay has everything it needs to authenticate your certificate.